Create a new document (Ctrl+N) in Adobe Photoshop with the size 1024px by 640px (RGB color mode) at a resolution of 100 pixels/inch. Use the Paint Bucket Tool (G) to fill with #2AC3AF color the new background layer.

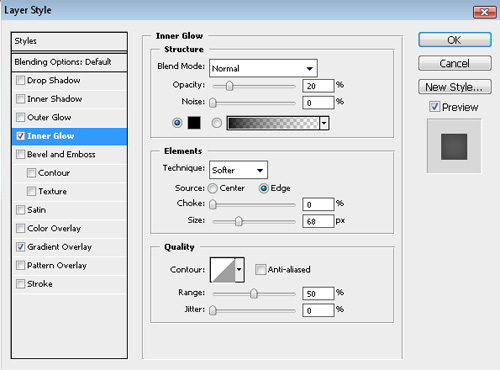
Click to Add a layer style icon from bottom part of the Layers panel and select Inner Glow:
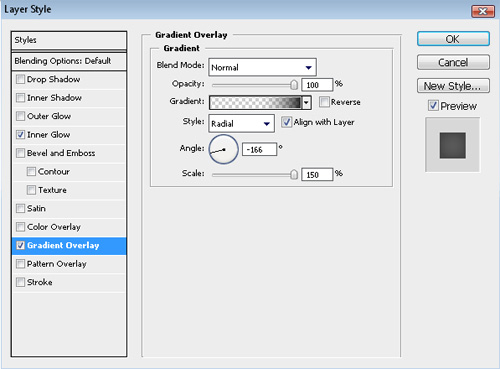
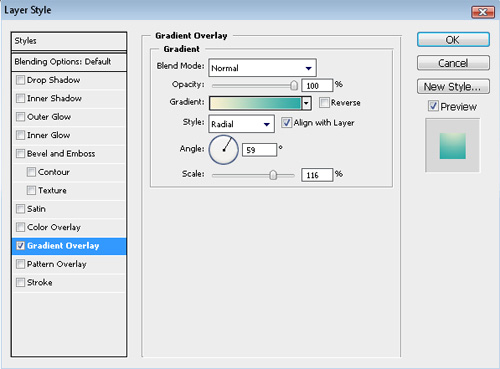
Add Gradient Overlay
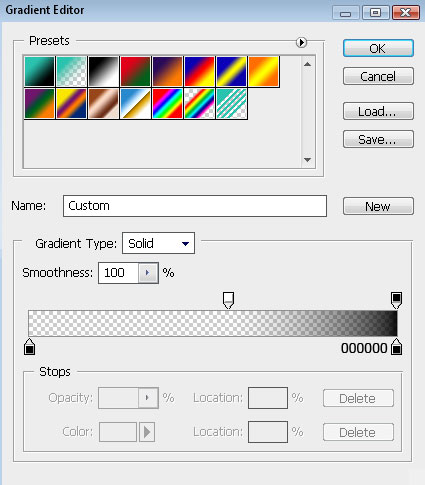
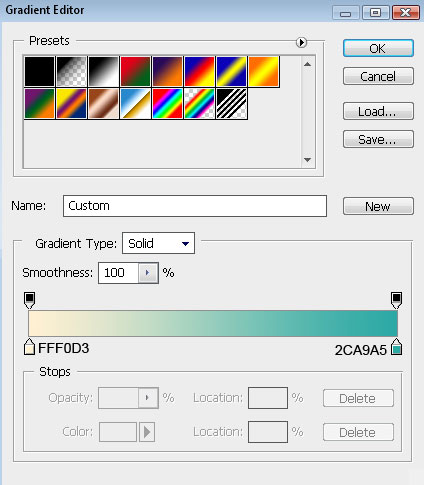
Click in the color bar to open the Gradient Editor and set the color stops as shown. Click OK to close theGradient Editor dialog box.
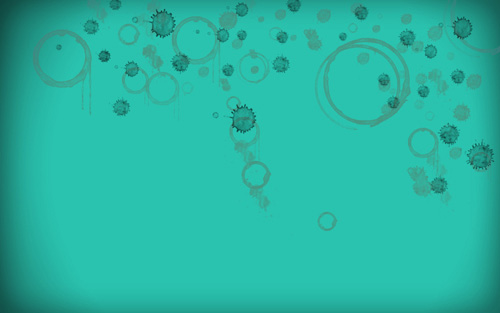
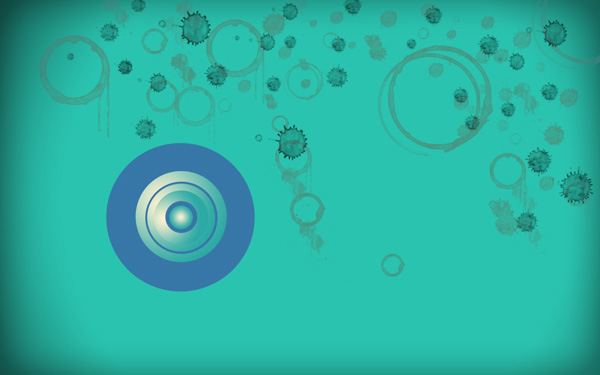
We’ve got the next background:

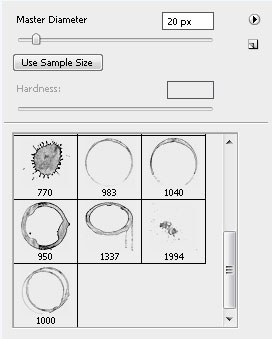
Next we have to download a set of ready to use brushes for Adobe Photoshop: Coffee_Stains from qbrushes. Then create a new layer (Create new layer) and select the next brushes from Coffee Stains set.
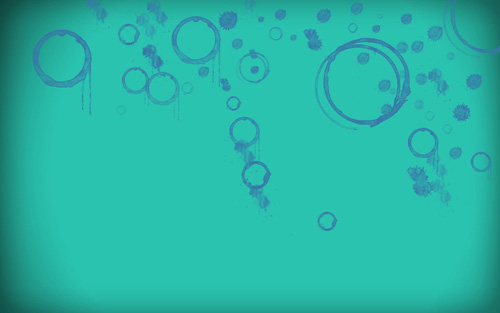
Use this brushes to add some coffee stains on our background as shown:
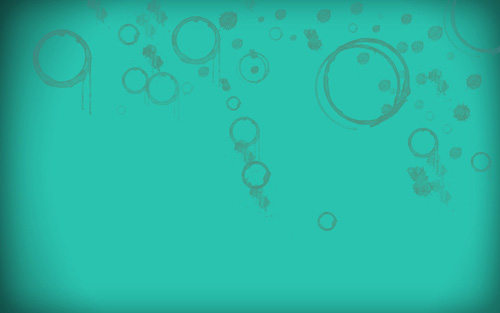
Set Fill to 70% for this layer and change the Blending Mode to Exclusion
We’ll use the next brushes from Coffee stains set for the next layer, but for the beginning create a new layer and select a darker color for brushes.
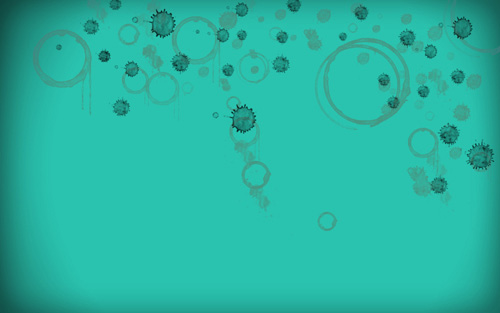
Set Fill to 80% for this layer
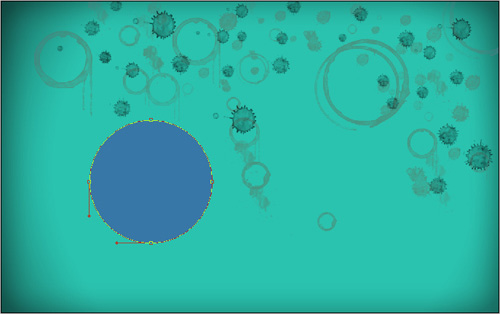
Take the Ellipse Tool (U) now and try to represent a ellipse, filled with #3777A7 color
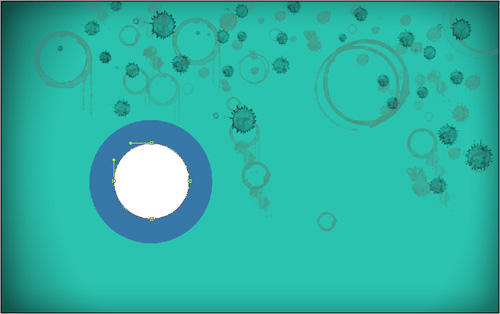
Using the last tool, we may represent another small ellipse inside the previous one:
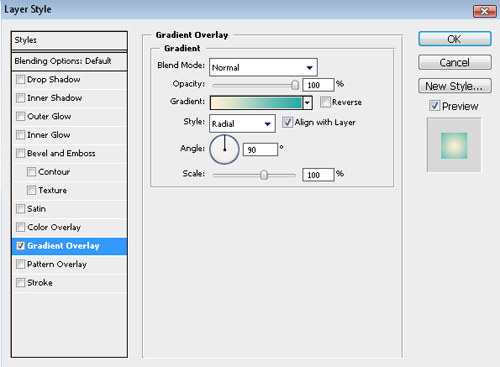
Click Add a layer style icon from bottom part of the Layers panel to select Gradient Overlay:

Click in the color bar to open the Gradient Editor and set the color stops as shown. Click OK to close theGradient Editor dialog box.

We’ve got the next result:

Make a copy of the earlier made blue ellipse and choose the Free Transform (Ctrl+T) command to make the copy smaller and to place it the way it is demonstrated next picture:

Make a copy of the earlier made ellipse with the Gradient Overlay style and then select the Free Transform (Ctrl+T) command to make the copy smaller and to place it the same way presented below:

Make one more copy of the last layer and choose again the Free Transform (Ctrl+T) command to make the copy smaller but changing the layer’s Gradient Overlay:

Gradient Overlay settings:

We’ve got the next result:

Make a copy of the small blue ellipse, represented earlier and use the Free Transform (Ctrl+T) command to make the copy smaller and to place it the way it is shown below:

Next we have to select the Ellipse Tool (U) and represent a small ellipse on the central part of the previous blue small ellipse.

Click on Add a layer style icon from bottom part of the Layers panel and select Gradient Overlay
Click in the color bar to open the Gradient Editor and set the color stops as shown. Click OK to close theGradient Editor dialog box.
We’ve got the next speaker:
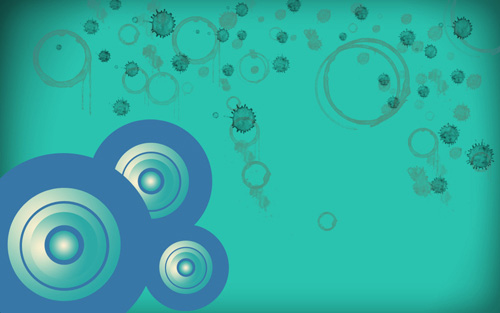
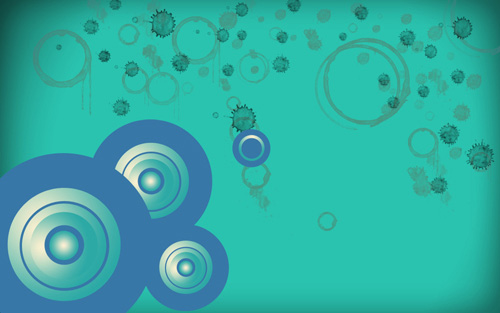
For our convenience we’ll combine in a group all the layers, composing those several ellipses (press the Ctrlbutton and select the necessary layers, keeping pressed the left mouse’s button drag the selected layers down onCreate a new group icon from bottom part of the Layers panel). Make three copies of the group and select theFree Transform (Ctrl+T) command to change the group’s copies’ sizes
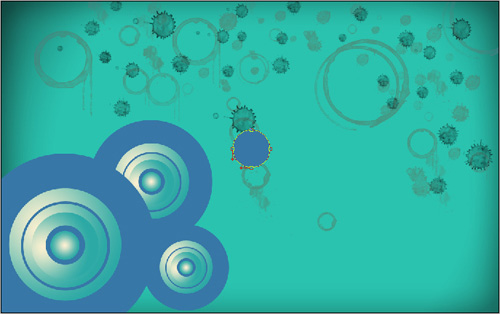
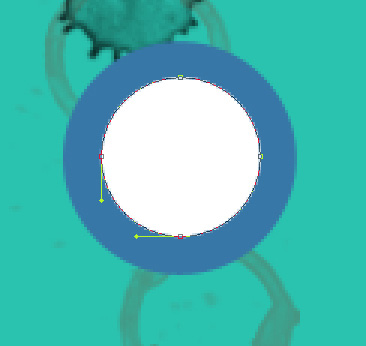
Select again the Ellipse Tool (U) and make a ellipse, filled with #3777A7 color
Try to represent inside the made ellipse one more smaller ellipse:
Click on Add a layer style icon from bottom part of the Layers panel and select Gradient Overlay
Click in the color bar to open the Gradient Editor and set the color stops as shown. Click OK to close theGradient Editor dialog box.

We’ve got the next result:

Make a copy of the earlier made blue ellipse and use after that the Free Transform (Ctrl+T) command to make the copy smaller and to place it on the central part of the element:

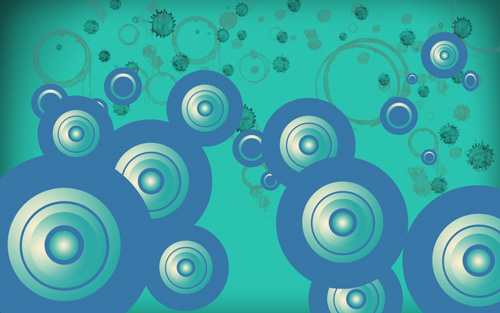
As we have described earlier, we have to combine in a group all the layers, composing those three small ellipses (keep pressed the Ctrl button to select the corresponding layers and drag the layers down on Create a new group icon). Make eight copies of the last made group and select the Free Transform (Ctrl+T) command to change the copies’ sizes and to place them as it is indicated on the next picture:

Next we’ll work with the first group.

Make seven copies of the group and select again the Free Transform (Ctrl+T) command to change the copies’ sizes if necessary, placing them the way presented below:
Make one more copy of the ellipses’ group and changing the Gradient Overlay settings, we’ll get two more groups of circles.

Changing the Gradient Overlay settings of the second and of the third circle on this one indicated below: